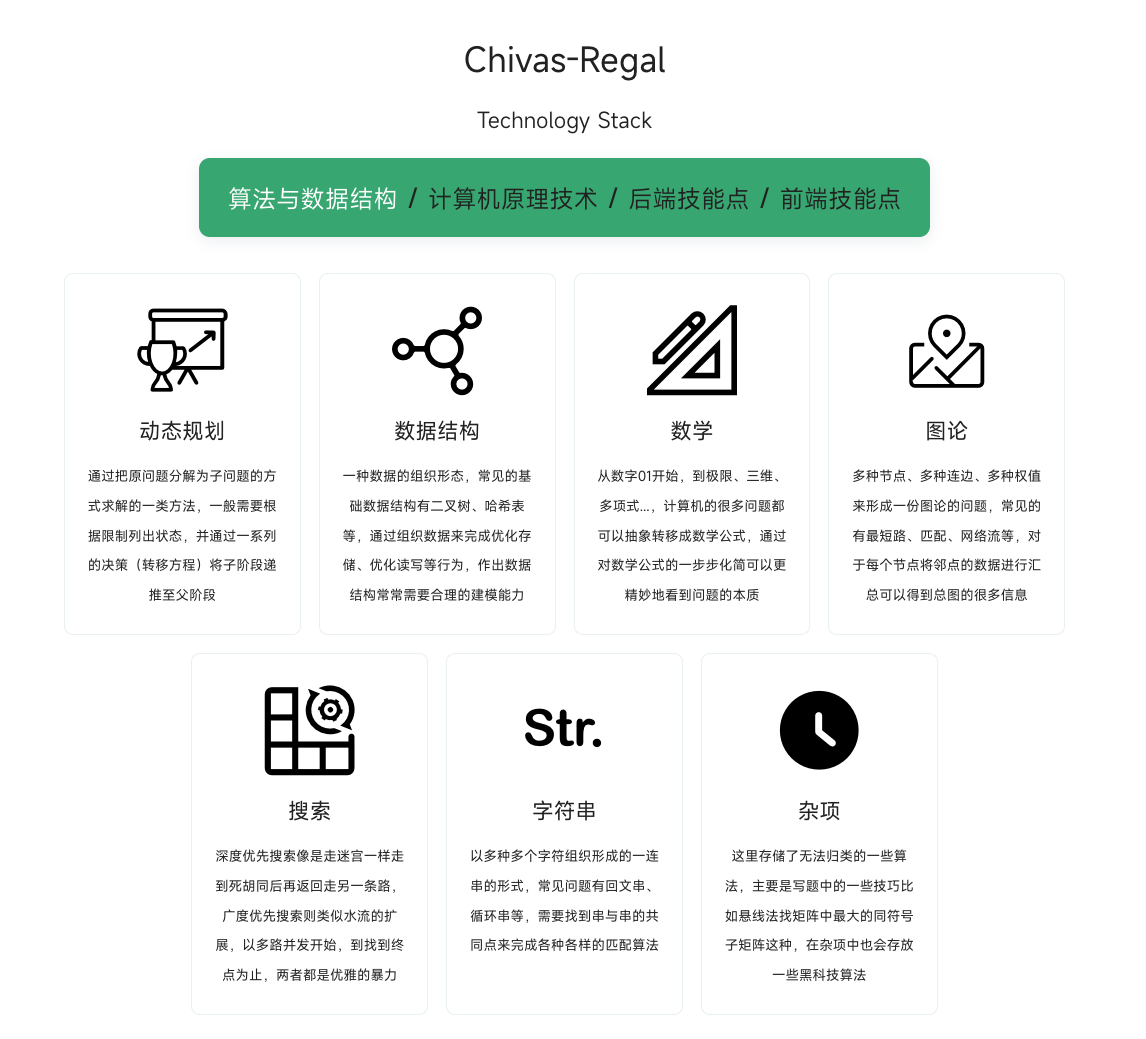
主页多级标题快速入口
先放一手成品效果

这里支持直接通过 README.md 来解析出要展示的”一级标题框“与”二级标题框“
并且每个一级标题对应多个二级标题,通过点击对应的一级标题框,下面会展示不同的二级标题框
通过点击每个二级标题框,可以实现跳转到指定网址
但是这里不会讲解样式,只会说明这个逻辑是怎么做的
# 变量数据分析
先找到我们想要添加的位置
主页就是 home ,对应到 theme/components/Home.vue 这个组件下了
找到原先的”快速开始“绿色按钮的位置
不想要的话就把它注释掉
<!-- /.vuepress/theme/components/Home.vue -->

<ModuleTransition delay="0.16">
    <p class="action" v-if="recoShowModule && $frontmatter.actionText && $frontmatter.actionLink">
        <NavLink class="action-button" :item="actionLink"/>
    </p>
</ModuleTransition>
2
3
4
5
6
7
然后它的下面也就是我们的几个介绍框(找了一下 MybatisPlus官网 (opens new window) 的主页)

它在根目录的 README.md 下的标头中是这样的格式
# /README.md

features:
- title: xxxx
  details: xxxxx
- title: xxxx
  details: xxxxx
2
3
4
5
6
7
这是一种 .yml 格式的文件哈,在紧接着我们找到 vue 源码按钮下这样一段,是它来解析着这段 yml 了
<!-- /.vuepress/theme/components/Home.vue -->

<ModuleTransition delay="0.24">
    <div class="features" v-if="recoShowModule && $frontmatter.features && $frontmatter.features.length">
    <div v-for="(feature, index) in $frontmatter.features" :key="index" class="feature">
        <h2>{{ feature.title }}</h2>
        <p>{{ feature.details }}</p>
    </div>
    </div>
</ModuleTransition>
2
3
4
5
6
7
8
9
10
发现 features 刚好对上了,好的我们下面开始编写多重标题入口
# 逻辑
# 两重循环提取二级标题
yml 是一种简单的配置文件,可以简单了解一下语法,这里直接说配置方案了
一级标题是 features 下的一个数组,自己的信息只需要一个 title 即可
二级标题是每个一级标题下的一个数组,我们可以用 children 来作为数组名放在每个一级标题里面
它自己信息要有”标题名“、”介绍“、”图标“、”链接地址“
对应的 yml 我们就写成这样
# /README.md

features:
- title: xxx
  children:
  - title: xxx
    description: xxx
    icon: xxx
    link: xxx
  - title: yyy
    ...
- title: yyy
  ...
2
3
4
5
6
7
8
9
10
11
12
13
这样就是我们上面说的二维数组了
在 Vue 中的接取我们可以直接调用初始化好的 $frontmatter.features 来完成
用 v-for 来进行遍历即可,逻辑如下
<!-- /.vuepress/theme/components/Home.vue -->

...

<div v-for="(h1feature, h1index) in $frontmatter.features">
    <a v-for="(feature, index) in h1feature.children" :href="feature.link">
        标题:{{ feature.title }}
        描述:{{ feature.description }}
        图标:{{ feature.icon }}
    </a>
</div>
2
3
4
5
6
7
8
9
10
11
这样就基本上实现了二重循环展示出每一个二级标题的入口
# v-if展示不同的二级标题
第二个功能,通过点击不同的一级标题来完成下方二级标题的切换
涉及到标题的打开关闭,我们用一个数据来记录现在开的是哪一个一级标题
// /.vuepress/theme/components/Home.vue

export default defineComponent({
    ...

    data() {
        return {
            h1_index: 0,
        }
    },

    ...
})
2
3
4
5
6
7
8
9
10
11
12
13
这里默认是打开的第 0 个,然后我们要有一栏专门展示一级标题
跟上面一样遍历
<!-- /.vuepress/theme/components/Home.vue -->

<span v-for="(h1div,index) in $frontmatter.features">
    {{ h1div.title }}
</span>
2
3
4
5
同时我们要完成点击切换的功能,加上点击事件 v-on:click="h1_index=index"
写全就是这样
<!-- /.vuepress/theme/components/Home.vue -->

<span
    v-for="(h1div,index) in $frontmatter.features"
    v-on:click="h1_index=index"
>
    {{ h1div.title }}
</span>
2
3
4
5
6
7
8
主体部分,依然是二重遍历,但是要根据 h1_index 也就是当前展示哪个一级标题的二级标题们,来判断这一个二重循环是否要进行
<!-- /.vuepress/theme/components/Home.vue -->

<!-- 枚举一级标题 -->
<div v-for="(h1feature, h1index) in $frontmatter.features">
    <!-- 判断当前一级标题是不是我们要展示二级标题的 -->
    <div v-if="h1index===h1_index">
        <!-- 展示二级标题 -->
        <a v-for="(feature, index) in h1feature.children" :href="feature.link">
            标题:{{ feature.title }}
            描述:{{ feature.description }}
            图标:{{ feature.icon }}
        </a>
    </div>
</div>
2
3
4
5
6
7
8
9
10
11
12
13
14
全部
<!-- /.vuepress/theme/components/Home.vue -->

<!-- 枚举进行展示一级标题,并通过点击事件切换我们要”展示二级标题“的一级标题 -->
<span
    v-for="(h1div,index) in $frontmatter.features"
    v-on:click="h1_index=index"
>
    {{ h1div.title }}
</span>

<!-- 枚举一级标题 -->
<div v-for="(h1feature, h1index) in $frontmatter.features">
    <!-- 判断当前一级标题是不是我们要展示二级标题的 -->
    <div v-if="h1index===h1_index">
        <!-- 展示二级标题 -->
        <a v-for="(feature, index) in h1feature.children" :href="feature.link">
            标题:{{ feature.title }}
            描述:{{ feature.description }}
            图标:{{ feature.icon }}
        </a>
    </div>
</div>
2
3
4
5
6
7
8
9
10
11
12
13
14
15
16
17
18
19
20
21
22
这就是整个的逻辑,当然样式方面,什么鼠标悬停、点击发生事件都可以自己根据喜好来设计
也是体会到了拿到框架源码想怎么改就怎么改的效果(乐
